
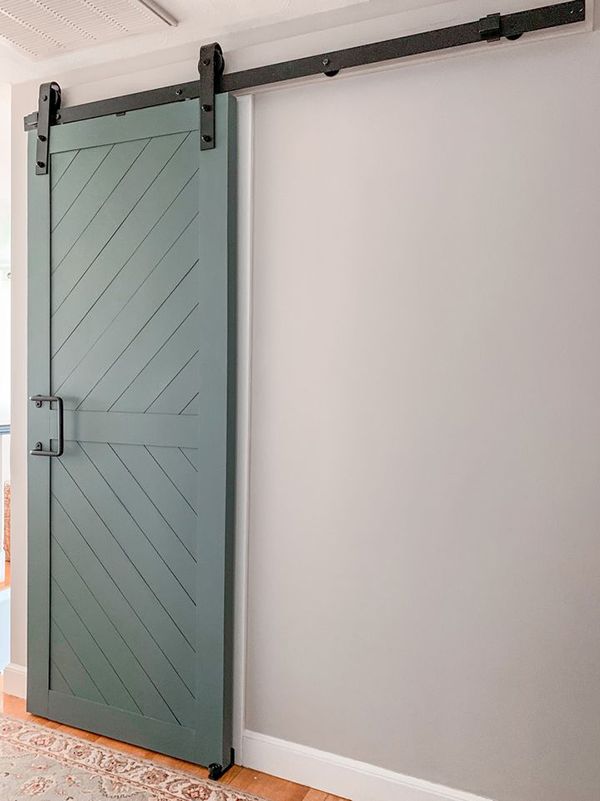
How to Create a Barn Door Using the Existing Door
-
Difficulty:Intermediate
-
Team:1
-
Time:2 to 4 Hours
Tools
-
Box Saw
-
Drill
-
Hammer
-
Nails
-
Screw Drivers
-
Screws
-
Tape Measure


Remove Your Existing Door
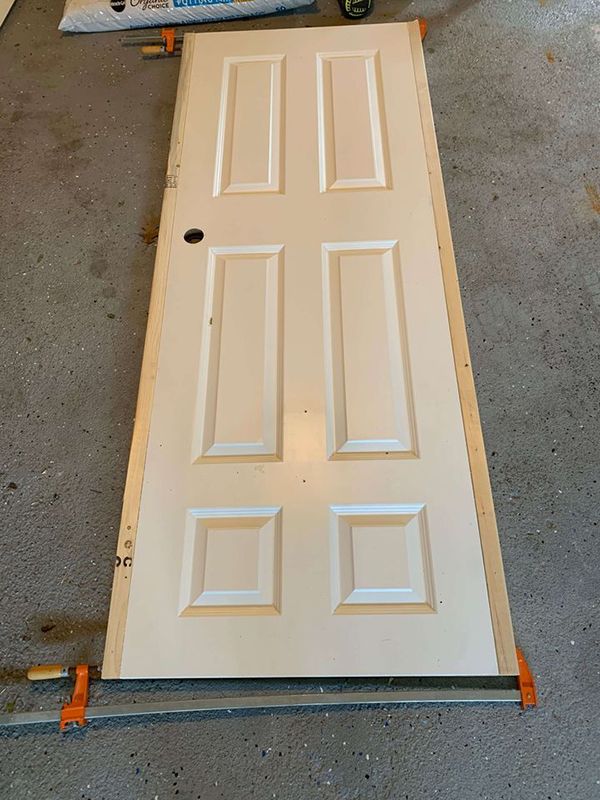
First, unscrew the hinges of your current door to remove it from the door frame. Remove the hinges from the door as well and also remove any door knobs or additional hardware. This door will serve as the base for your new modern barn door.
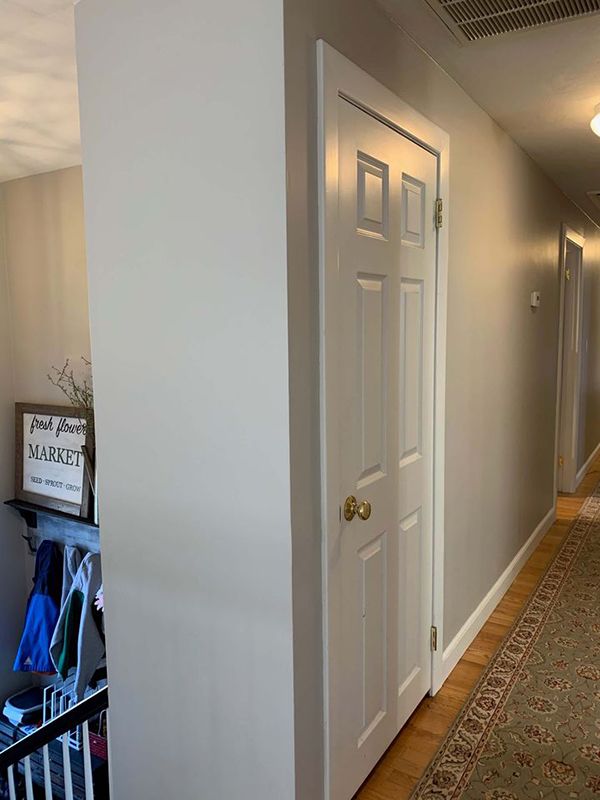
Use wood filler to fill the voids on the door frame where the hinges and door latch had been. Sand smooth and repaint to match the trim.
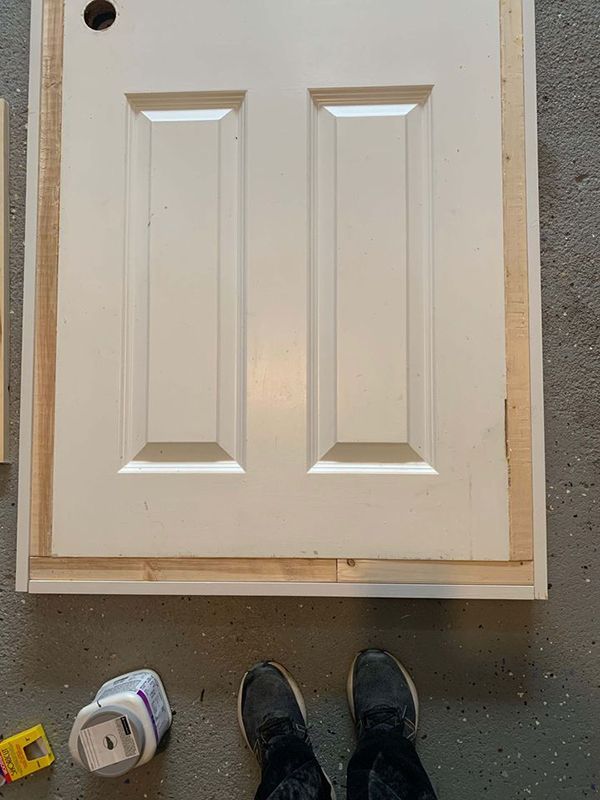
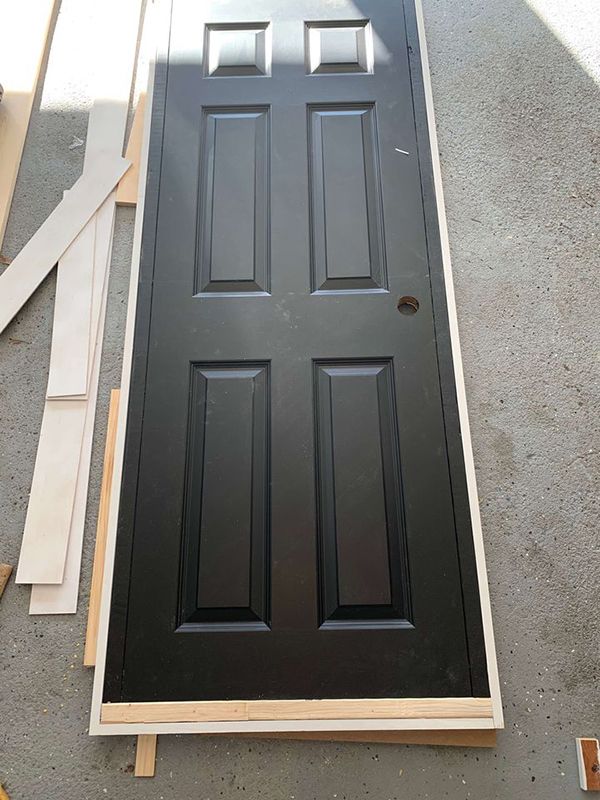
Add Height and Width to the Original Door
Barn doors are typically taller and wider than a normal door in order to cover some of the door frame. In order to re-create this with your existing door you need to add some additional wood for width and height. First add 2x2s around all door edges and attach with wood glue and screws. Then add additional 1x2 boards using wood glue and brad nails to give a bit more width and height but also provide a nice clean edge.
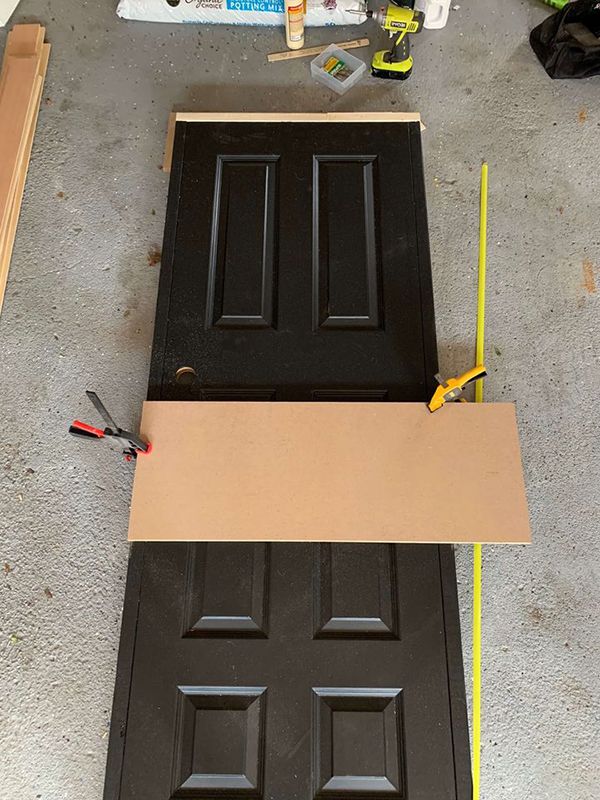
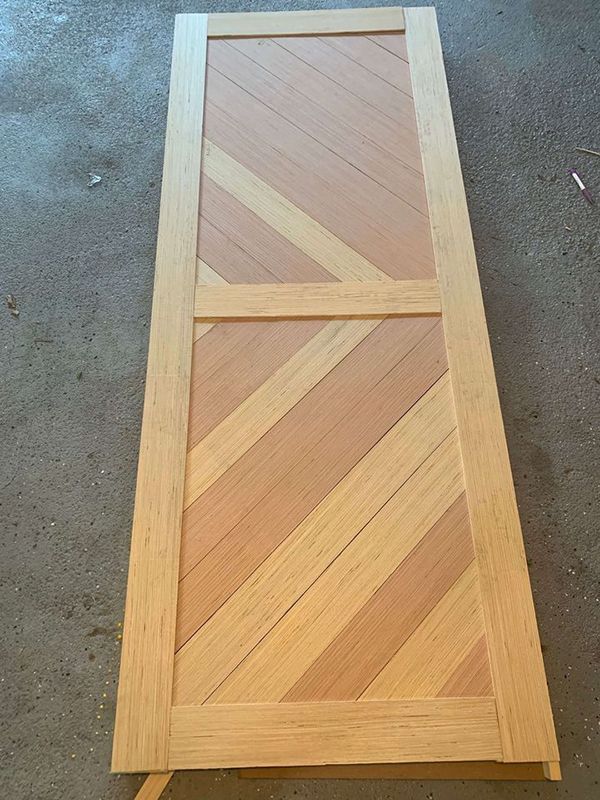
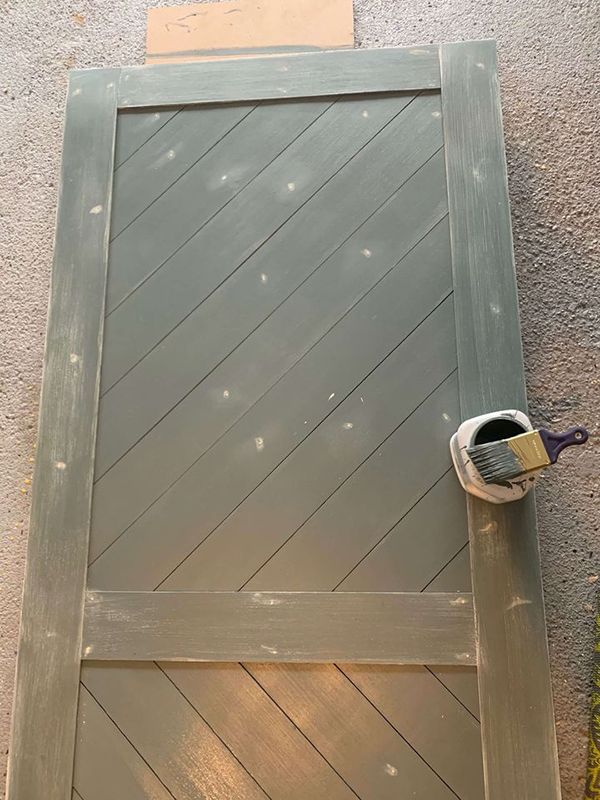
Create Door Design
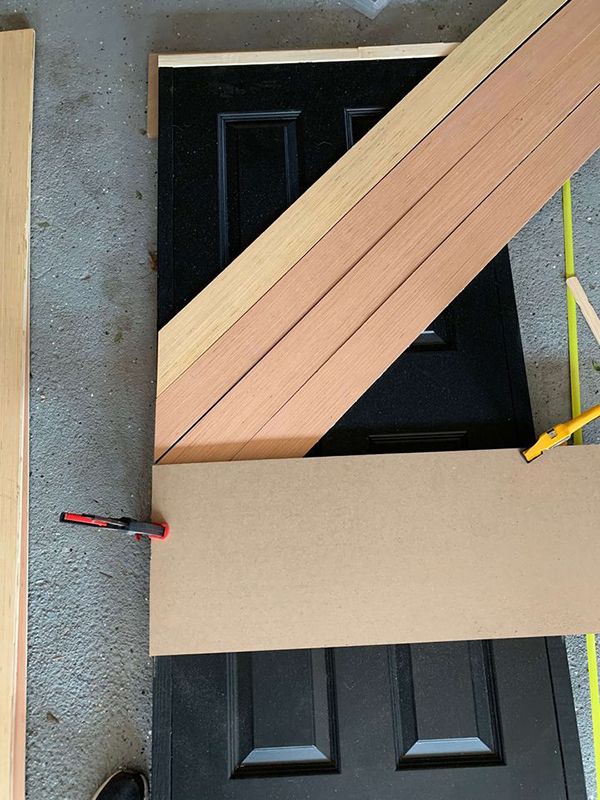
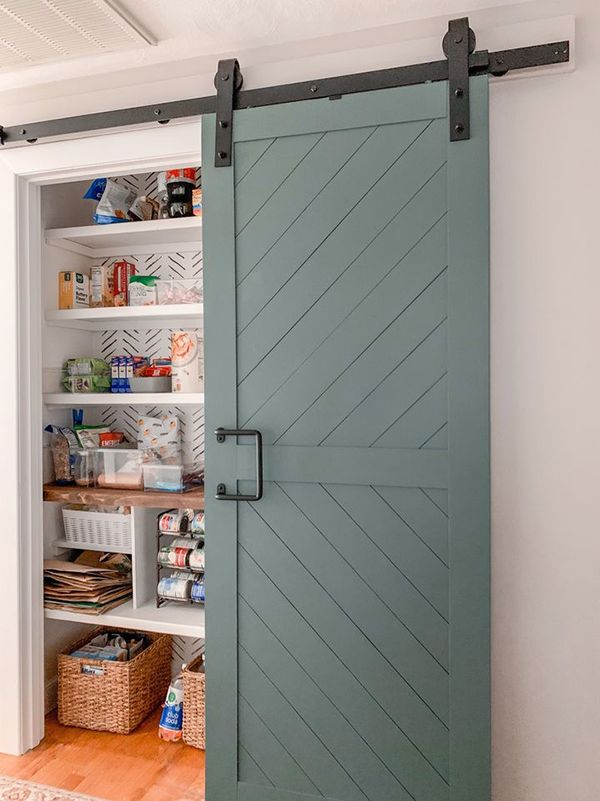
This door is a combination modern farmhouse herringbone pattern with a traditional shaker style trim. The design is created using very thin (5mm) plywood ripped down into 4" strips. First, mark the center line of the door. Then clamp a board across the center as the starting point for the top herringbone strips. All strips start with a 45 degree cut, so cut a few and then lay them out, weighing them down and using dimes as spacers.
With the strips laid out on the door, mark where they intersect with the other side of the door and then make another 45 degree cut to cut the strip to length. Repeat this process until the whole top side is done.
For the bottom side, essentially repeat the process but in the opposite direction. Keep the top strips in place so that the bottom strips can be lined up with the top. Then, again, mark where the strips intersect with the door edge and make your cuts. If painting before assembly, (which is recommended), make sure to label the strips so the order is known for assembly.
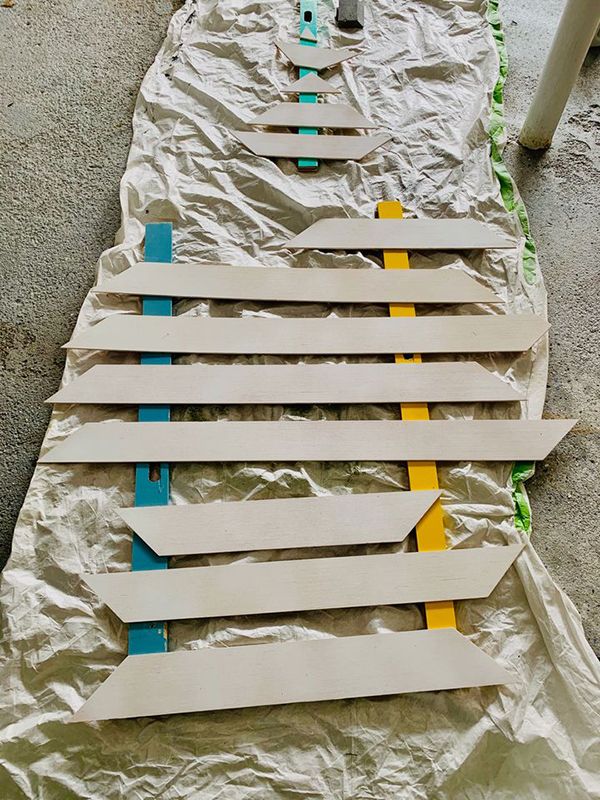
Prime and Paint Wood Strips
Now you have lots of wood strips to paint. Prime them all first with either a spray paint primer or regular brush on primer. Once dry, follow with two coats of your desired paint color. If changing the door color, also paint the original door, front and back, prior to attaching the wood strips. This door was painted black under the strips for a bit of contrast and the back side of the door was painted to match the wood strip color.
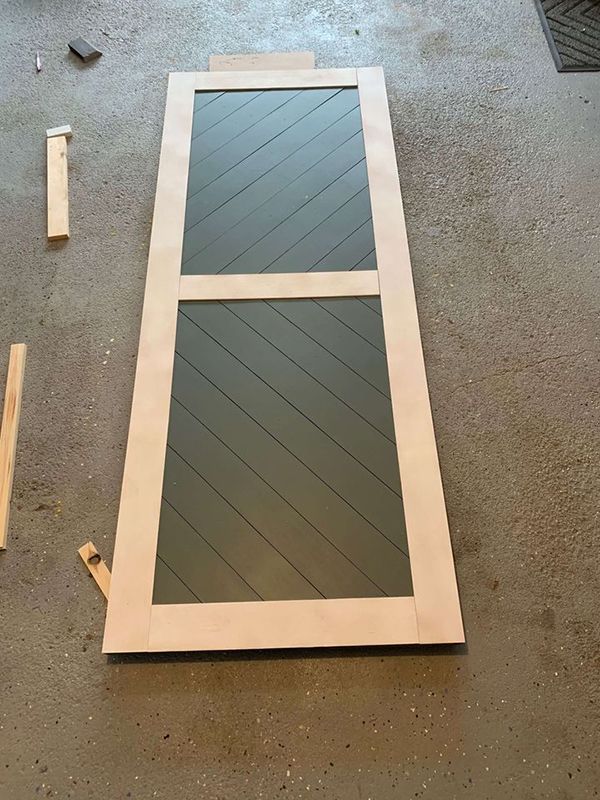
Assemble the Modern Barn Door
Now that the wood strips are all painted it is time to go back and lay them all out in the original order. Use dimes for spacers and 1" brad nails to secure. Add shaker style trim (2 long strips the length of the door sides and 3 shorter strips that fit in between the long side strips). Fill all the nail holes, caulk seams, and apply touch up paint.
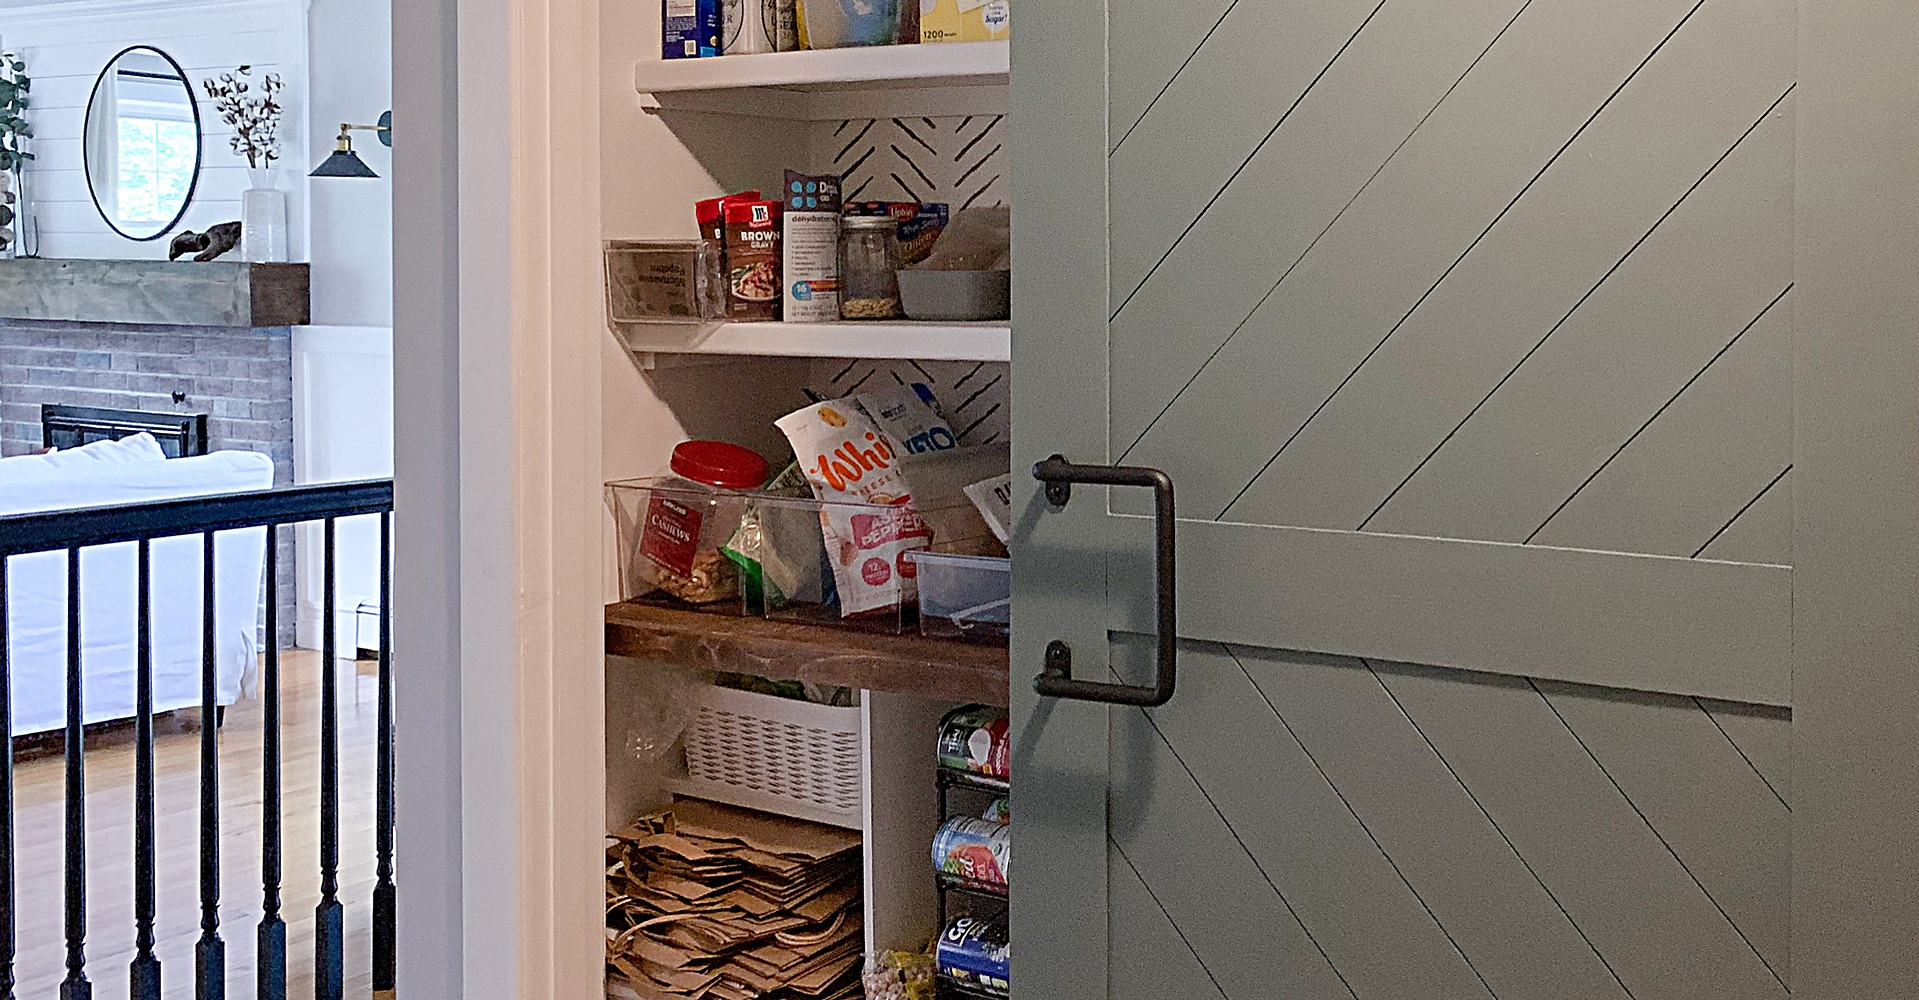
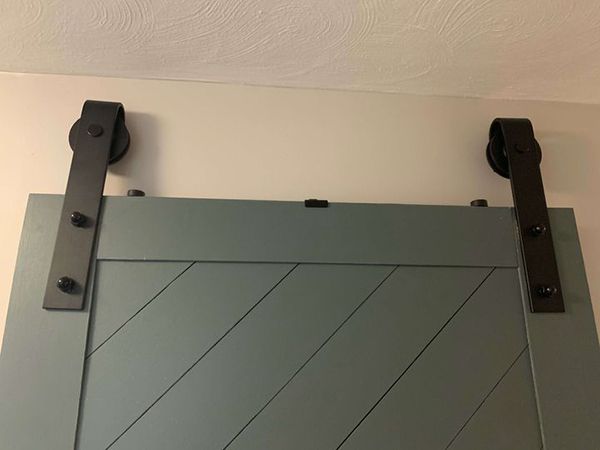
Add National Hardware Barn Door Hardware
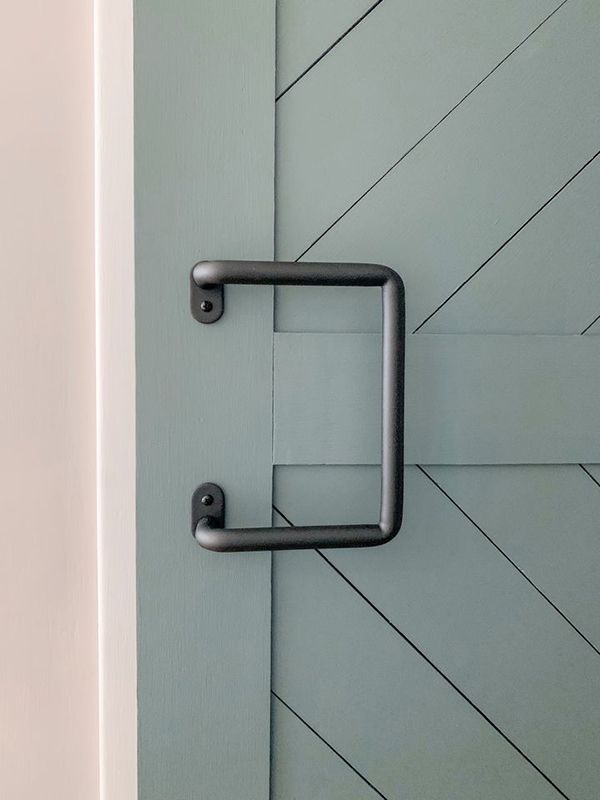
Follow the directions provided in your matte black designer interior barn door kit. Installation is super easy and everything you need is provided in the kit! Lastly, finish with this super cool, low profile, matte black 8" Troy pull handle.
This modern barn door is super budget friendly to create, costing less than $30 in wood and supplies!
Hardware
- Tags:
- Barn Door Hardware
- Closet Hardware
- How To Projects
- Weekend Warrior
- Bedrooms
- Closets
- Entryways
- Indoors
- Kitchen
- Living Rooms
- Related Product Categories:
- Barn Door Kits
- Barn Door Hardware
- Barn Door Handles & Pulls